Sugar-Free Vanillekipferl + Recipe for Christmas
Sugar-Free Vanillekipferl
These cookies originate from Vienna, Austria and they are tradionally baked at Christmas time...The cookies have a crescent form and is being made either with a real vanilla or with artificial vanilla flavor...
They are very popular too and widely baked in Germany and the Czech Republic...If you have visited Vienna, you may have encountered these cookies because they are served in most Viennese Coffee Shops all year round. And if you are about to visit our city, then you should not miss these cookies in coffee shops.
They are traditionally baked by almost all austrian families as their first on their baking list at Christmas season. Other recipes call for hazelnuts as ingredient, but the the widely used is ground walnuts.
They are very popular too and widely baked in Germany and the Czech Republic...If you have visited Vienna, you may have encountered these cookies because they are served in most Viennese Coffee Shops all year round. And if you are about to visit our city, then you should not miss these cookies in coffee shops.
They are traditionally baked by almost all austrian families as their first on their baking list at Christmas season. Other recipes call for hazelnuts as ingredient, but the the widely used is ground walnuts.
Ingredients:
200 grams all Purpose Flour
100 grams ground walnuts
50 grams confectioner´s sugar
For those who are avoiding sugar : 200 grams all Purpose Flour
100 grams ground walnuts
50 grams confectioner´s sugar
use 5 tbsp sugar substitute in powder form such as Stevia or Saccharine
1 Pack Vanilla sugar such as Dr. Oetker
200 grams cold butter cut into small cubes
1/2 cup Confectioner´s sugar or sugar substitute to coat the cookies...
2 - 3 tablespoons milk
How to:
1. Mix flour, ground walnuts, sugar...blend well. Add the cold butter cut into cubes and blend all ingredients to a smooth dough, add the milk so that the dough becomes soft, flexible and easy to form...this prevents the shape of the dough from breaking when formed..
2. Scoop a small portion of the dough ( around 1 tsp) with your fingers and form
this between your palms so that it resembles like a quarter moon just like the
form in the photo shown below.
3. Place on a baking pan that is covered with baking paper, and arrange these
in rows... bake in a preheated oven of 180°C for about 15 minutes... remove
and place on a platter and coat the cookies with sugar ... if necessary, add
more confectioner´s sugar to coat when they cool down..
4. After cooling, place these in a cookie tin can and cover... after 2 days, they will
become softer...These can also be frozen and should be thawed 1 day before
consuming..
Happy Baking!
Granola Kisses + Recipe
GRANOLA KISSES
As Christmas is just a few more weeks away, lots of us are into baking cookies at home. I have started baking some already today and I´m featuring one of them here..
Granola Kisses are easy to make and you can store them in tin cans so they get softer within a couple of days after baking... I make them in advance for the Christmas celebration or put them on the table as finger food just in case some friends or relatives come by. They can be frozen so you can also make plenty in advance and just thaw them just a day before Christmas.
INGREDIENTS:
140 grams rolled oats
50 grams Hazelnut - ground
2 tbsp. cooking oil
4 egg whites
140 grams sugar or 8 tbsp sugar substitute in powder form ( Stevia, Saccharin)
3 tbsp buttermilk
Hazelnut or walnut for toppings
30 gram chocolate bar, 4 tbsp milk ( blend the milk + chocolate and adjust milk, so that its consistency should be more liquid like).
How to:
1. In a pan with 2 tbsp cooking oil, roast the rolled oat + the ground hazelnuts til
golden brown, set aside.
2. Whisk the egg whites + the buttermilk with a mixer adding sugar by and by
until mixture is stiff. Add to the rolled oats and blend well til all oats are well
coated.
3. Scoop the mixture using a spoon and place it on a baking pan with baking
paper, forming the mixture into a round one and top it with a walnut. Bake in a
preheated oven ( lower rack) under 180°C for about 15 minutes until the
cookies are done.
4. Arrange on a platter and using the tip of a tablespoon , scoop hot chocolate
previously heated-up with milk and pour it forming swirls on top of each of the
cookies.. Let cool, then arrange on a muffin paper sheet. It will become softer
if stored in tin can covered for a couple of days... These can be frozen.
HAPPY BAKING!
MENUDO ...My Dad´s Version
MENUDO - My Dad´s Version
The mexican menudo is kind of a soup that has chili in it! My Dad´s version or to say, the Filipino version uses pork meat and is a mild one and has little liquid to almost dry in consistency. We always enjoyed this dish at home when my Dad cooked this on Sundays at home... He had all those fresh bell peppers from our backyard ... and I can still vividly remember how he cooked his recipe... This is really a delicious dish which can be eaten with or without rice and most Filipino families serve this on special occasions. I hope you would find this recipe worth trying....
Ingredients:
1 Kg pork filet cut into cubes of about 2x2 cm or bite size marinated in 2 tbsp soya sauce for about 20 minutes
1 kg potatoes , peeled & cut the same size as the pork filet
3 cloves crushed garlic
1 onion, also cut into cubes
3 toast bread cut into cubes same size as the cut meat
1 each red & green bell pepper cubed
2 cups frozen peas ( thawed)
3 tbsp soya sauce
2 tbsp tomato paste
3 cups vegetable soup ( Knorr cube) or water
salt & pepper, creme fraiche (optional
cooking oil for deep frying potatoes and toast bread

How to:
1. In a casserole, deep fry cubed potatoes in hot oil til golden brown ...set aside. In the same oil, fry the cubed toast bread til golden brown, set aside.
2. In a pan with 2 tbsp cooking oil, fry the crushed garlic , add the onion, then the pork filet.. all til golden brown...
3. Add the bell peppers to the pan, continue mixing....then add the tomato paste, soya sauce, 2 cups vegetable ( broth) soup, thawed green peas,.... bring to boil, simmer under low fire til the meat really becomes tender about 15 minutes.
At this stage, the liquid must have evaporated already, so add 1 tbsp flour diluted in 1 cup soup/water + 1 tbsp soy sauce ( more liquid if necessary) to the meat and carefully ´mix all ingredients...
4. Season with salt & pepper ... if you prefer to add the vegetable soup instead of water, season with less salt as the vegetale broth contains salt already...
Now, for a more tasteful menudo, I add 1 tbsp of creme fraiche ( or double cream) to the meat... but this is really optional.
5. Add the deep fried potatoes to the meat mixture and carefully mix all ingedients... adjust seasoning as necessary.
Serve with cooked rice or white bread...This dish can be eaten alone because of the potatoes, but we prefer to eat it with freshly cooked rice.
Happy Cooking !
Decorating Ideas For Vintage Laces
Most of my readers know that I´m an avid collector of anything blue and the ones above are part of it.. In order for me to highlight the cupboard because of the dark background, I used vintage laces that were handed down to me by my Granny...These laces were handstitched and are really beautiful. I got plenty of these so I thought of using them in many ways.
For the ones that are one of a kind and did not belong to a set, I used it as trimming like in this neck pillow.
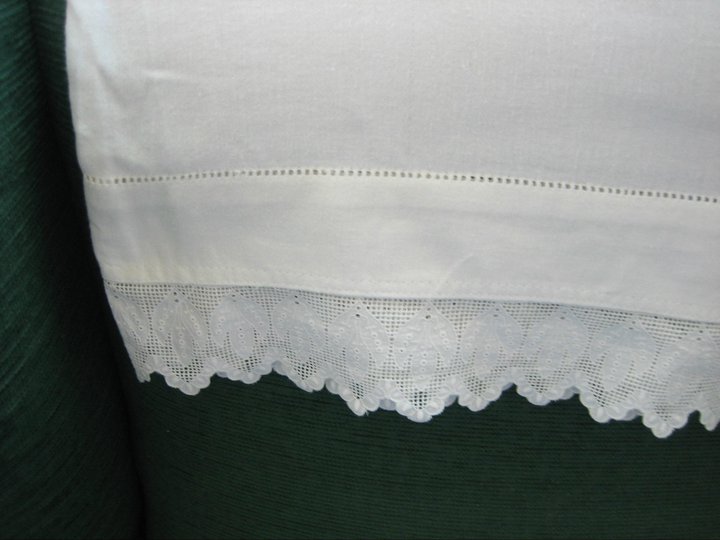
I also trim a pillowcase which in turn can be used to protect the chair from becoming soily as píllowcases can be washed and the chair is difficult to clean if it gets soily.
this is an intricate stitchery that has been in hubby´s family since decades, her Grandmother
was fond of the richelieu embroidery. This can be used to adorn a pillow that was actually used
cover the seal that cold air that slipped inside the room, the houses in those days did not have
double glazed as in today´s modrn world.
This is also a lace or shall we say doily crocheted by Granny and now
covers my reading chair.
A vintage lace that I cut and recycled to use as trimming for the
bed skirt.
the above is an intricate lace and is 1 of 6 that I´m still keeping and
just don´t know yet what to make out of them.
This is also an old intricately stitched doily and I use it just for display...
the tray is made by an aunt who is producing and exporting their
rattan products.
Whatever vintage laces you may have, make the most out of them,
display them in so many ways and show how lovely they are...
Afterall, not so many women are lucky to have such treasures!
Til next,
Mercy
The Odyssey of an Amazing Spanish Amaryllis
These were the very first blooms after the bulb arrived in Vienna from Spain. The Story one year before is below the update.
Update : the year after
Below, is an update of this amazing plant, a year after I got it from my spanish friend( updated today June 3, 2013). In the meantime, it has now about 6 tiny siblings and I´m cultivating them...
above & below, the updated pics, 1 year after... 2013
One year after , this stalk reached around 80 cm in height (2013).
THE STORY
It came all the way from Southern Spain, this amazing amaryllis...
A spanish friend loves gardening and Amaryllis is one of his passions.
He grows , propagates and sells some of them. I guess, I was lucky to have gotten
the biggest bulb he had.
The Story of this amazing plant began at a friend´s house.
When I got it, it was sprouting and developing its top, so I had to be careful not to damage the stems and the flower because I want to bring it home after the holiday.
To be able to transport it to Vienna, I wrapped it like a mummy with full of wet sponge and old newspaper, placed it in a freezer bag and add as part of my luggage for check-in.....
and it did survive the flight!
The day after, I set it in a pot and it started blooming amazingly!!!
Later, after 2 weeks of aaaahhhs & ooooohs, we finally cut the stem as the flowers dried off...
But, a miracle happened, there was new growth of stems again ,
and just like the first round, each stem ( there were 2) had 5 or 6 flowers....
Super, wasn´t it?
If you´ll have a look at the above photo, the 1st stem had at least 5-6 flowers and the
2nd stem, have had also the same.
A close-up Photo of the center of amaryllis.
I have really no idea how to grow amaryllis, this is my first and I think I was lucky
to have picked the biggest bulb...
Five months after, the original bulb has gotten 5 newbies which I now propagate,
and in a year or two, it will start blooming ( well, at least I hope so!).
***************
Thank you for reading my blog today and wish you were inspired by todays´s posting.
Wishing you all a pleasant morning/evening wherever you are in your part of the world.
Til Next,
Mercy
Colorful Stylish Mineral Earrings
Hi everyone! Today, I will simply share some of the earrings I have made in the past... I collect mineral stones and as I find the time, I make them into jewelries like the earrings above.
These sets of earrings were made in a very simple way using spacers, wires, hooks, stones and crystals.. Minerals and semi-precious stones are very fascinating materials to work with. It´s so amazing how a simple stone can be turned into a fabulous gem....
Agate & Tiger´s eye
Lapis lazuli
Jasper, Agate and Swarovski crystals
Freshwater pearl and Agate
Green colored Howlithe with spacers and Swarovski Crystal...
If you would love to create your own jewelries, try getting some reference books or magazines on working with Beads... there are many available in the market, try your bookstores or maybe try the tutorials in youtube.
I wish everyone a happy Sunday!
Til next,
Mercy
Subscribe to:
Posts (Atom)