Challenging Arts & Crafts

The Making of Irish´s Necklace


When my niece Irish asked me to make a mineral necklace for her, I set-up to work and made one for her. The materials I used  were sponge corals, brass toggle and brass wires for the chains. Here are the pics  that would show the beginning, progress as well as the finished necklace.


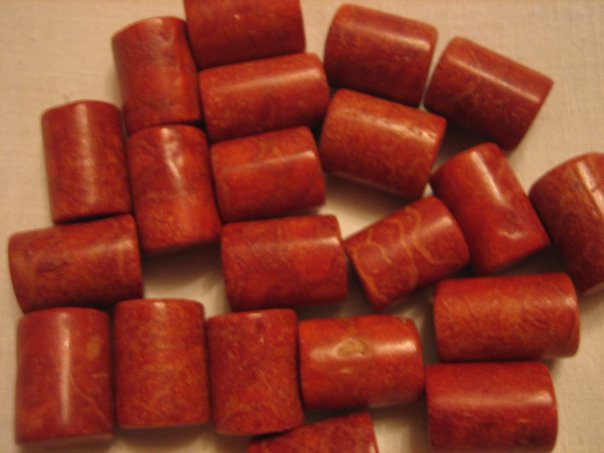
There are lots of  mineral shops in and around Vienna, so many semi-precious stones to choose from...It´s really difficult  which/what stones to use because the supply of various beads is really enorm. As you can see above, I have used sponge corals, they are not endangered types , so they are available  in any market in Asia, Europe or the US.


I  have a set of electronic tools  ( above) which are so superb to use to bend, cut and design the wire for the stones being put together to form the necklace.


I love using  toggles as closure for this necklace because they´re more handier than any other clasp.


When I finished  her necklace, I wrapped it and sent it to Irish via Airmail and thank God it arrived safely to its destinations.


I was so relieved that she got her necklace intact and you can see it from her face that she is happy about it. That´s all for today and I hope you all have a good start of the week. Thank you for visiting my blog!

Til next,

Mercy

A Cherished Heart


Sometimes, I dip into relaxation at home not only on week-ends but on weekdays, too. And for me, crafting is  one form that relieves me from stress after a hard day of work in the office. One crafting that is suitable for me infront of the TV is crocheting or quilting and many others.
During week-end, I also really indulge in sewing and one of the crafts I do is sewing fabric hearts.


For the trimmings, I crochet a flower and add beads in front fastened by a button... The back side can be of different fabric...


Here, my fabric heart has a zigzag accent that makes the edges prominent. It also gives a wonderful effect on its overall outlook .. It´s nice to think that the little details added to your heart might lift-up the spirit of the person to whom you are giving it to.

By giving your heart to someone, you will make that person feel special and in return earn a smile...

Til next,

Mercy

Displaying Decorative Plates


Collecting blue and white ceramics is fun, and it´s really awesome to collect them.  My plates are simple and do not really cost so much, it is these two colors that really attract me to collect them. Since I only have small space to display them, either I put them in cupboards grouped together or hang them on walls or display them standing on top of a cupboard or plate rack..


   Above,  I grouped the plates together with other blue & white wares in the cupboard


Using the above holders, I also display them on top of cupboards or drawers. What makes the display interesting is the different mixtures of the shapes and designs of the plates, and again, the pulling factor is its blue & white colors.


I also use this plate holder intended for plates that do not have holes for wall hanging. They come in various sizes and you can  get  them in household stores or Home Decor shops or maybe in your nearest hardware shop.


It was my desire to get a plate rack to display the tiny plates that hubby & I collected, but I wasn´t able to find one that I like.... so I built the one above using simple wooden strips , put them together, nailed, painted, sanded, and painted again then stenciled. This plate rack was my gift to my hubby on his birthday.

So dear friends, do not hide your decorative  plates, with those simple ideas you should show-off your wonderful collection , enjoy it and let your heart smile!

Til next,

Mercy

A Fascination - Charm Bracelets


Minerals or semi-precious stones are fun to work at. It really amazes me how these simple stones can be turned into fabulous jewels. An english lady beside me at the Airport was wearing such a very pretty bracelet made of various stones and charms that was set on a brass wire.. I just love what I saw and kept the image on my mind and I promised myself I will make one someday.  


A few online researches plus a couple of books on the methods of  crafting mineral stones into a jewelry  fascinated me more than I can imagine. The next thing I knew, I was into this craft and started making some pieces that  could matched any lady´s attire, casual or elegant.  The charm bracelet in the above photo was one of the  firsts  I did that was ordered & sold out to an american lady who in turn gave it to her mother as a Christmas present. 

It is indeed a great feeling having someone out  there finding my lovingly handcrafted crafts being loved and appreciated.


Here are some of the charm bracelets I made  and am sure , more will be finished soon as I find more time to do this exciting craft.


Sponge Corals and fresh water pearls    


       Lapiz Lazuli


                               Various colored agate            


I hope you have enjoyed today´s feature of the charm bracelets.

Coming up next is a blog on how I use plates as home decor.

Please do visit my site again and if you have comments or questions about one of the postings,

I´ll try my best to answer them.

Smile!


Til next,


Mercy

Berry Muffins + Recipe


I haven´t been baking for quite sometime... and today, just so.... I baked  Berry Muffins. The recipe is a fusion of  simple ingredients and how to instructions  that produces good results  nobody can  miss.
This is the first time I´ve used silicon muffin forms, I have to admit that I have my reservations in the beginning and after today´s baking, I must  say  that the forms are one of the best inventions in the baking world, simply "super" forms they are!

Below is the Recipe and instructions, and I hope you enjoy baking this!
BERRY MUFFINS + RECIPE

Ingredients :
1 cup coarsely chopped walnuts or almonds,
2 cups sifted all purpose flour,
1 teaspoon baking soda
a dash each of cinammon & nutmeg powder
1/4 tsp. salt
2 cups sugar, if you avoid sugar, substitute this with 8 tbsp. Stevia in powder form or sugar substitute called Natreen or any other substitute that does not contain Aspartam
3/4 cup vegetable oil
1 cup buttermilk
1 tsp vanilla or 1 pack vanilla sugar
3 eggs
1.5 cups of mixed fresh or frozen berries


Preparation:
1. In a bowl, mix together the flour, baking soda, cinnamon & nutmeg (optional) & salt

2. Add the sugar, oil,buttermilk, vanilla & eggs. Beat with an electric mixer at medium speed until batter becomes smooth, add the nuts.

3. Using a tablespoon , fill each muffin form of 12 with 2 tbsp batter ( about 3/4 of
the form), then top each form with mixed frozen berries , bake in a preheated oven of 180°C for about 20 minutes ( middle oven rack).

4. Cool muffins on wire rack. Serve warm or cold.


Since it was very hot today, I  served the muffins  together with an ice-tea made from Twinnings Lady Grey  adding juice of 1/2 lemon and Stevia to it ... muffins and ice tea, what else can you ask for, it´s simply perfect for hot weather we are experiencing at the moment... Summer has come back to Vienna and we´re all happy!!!

Have a nice start of the week and enjoy the hot... hot ...hot days coming our way til next week-end!

xoxo,

Mercy


Decorating - Staircase Wall


The row house we live in  reminds me of the houses in Amsterdam, those tiny pretty little houses that have many stairs..
Our house has total of 48 steps to reach the top most floor of the house and so as to avoid dull moments while going upstairs, we filled the empty walls of the staircase with various pictures that we love...Some were handed-down to us from family, some bought and some discovered in the flea market. The frames in the above pictures are mismatched but its group has one theme and that is flowers!


This grouping is a collection of masks we started when we once  lived in Africa. Though they aren´t pictures, they adorn our wall as well. Masks collection is still growing and added recently is a mask from the Ifugao tribe in Northern Philippines, while others came from Senegal, Kenya, Nigeria and Uganda.


We also love to collect copper etchings on Architecture... I was lucky to have received 4 of  Michael Coudehove Kalergi´s Architectural Etchings from a company I worked before.


The huge Batik you see above came from Nigeria. We removed its big frame when we transported it
back home , made its present frame out of simple wooden strips and painted it black. The embroidery below of a lily flower is my own stitchery project that I started  long before but only finished some 20 years after in Vienna.


I hope that you have picked-up one or two ideas from today´s blog... The last August week will be hot, at least in Europe, so keep your coolness and continue what you´re aiming for..

Have a nice Sunday everyone!!!

Til next,

Mercy

Bags for a New Yorker Lady


As promised, here are 2 more bags that I made similar to the blue & white stripes previously posted. They were meant for a longtime friend who lives in New York. They are very special, because they came from the first series of bags that I designed myself... The one on top is also handquilted and had 4 layers of fabrics including a lining that made it a bit stift.  As in all the bags I make, I see to it that they are of good quality materials. The inside lining is also 100% cotton.


Anyone who knows me in my Facebook page would know my design and that is to put a pleated band of different fabric and color to the top part... I also see to it that the color scheme of the band matches to the color hues of the bag body.


The lila bag above was machine quilted and was also made just the same way as the one shown on top most.  The picture shows the bag was in process, although I was really in stress finishing reports for my corporate job, I finally did its finishing touches before my trip commenced... I handed them over to the new owner who is a very dear lady friend from New York when we both visited our family in Asia.

I have so many craft ideas in mind and the only  thing that is lacking is time to realize those
projects .... time is so essential and that is what I don´t have at the moment..... Oh well,  I´ll find it soon somehow.

Thanks for reading and visiting me today! Have a nice evening/afternoon to all in the world wherever you are in right now!

Til next,

Mercy

Just A Matter of Pillow Talks


Pillows are one of the most comfortable things ever invented for sleeping. I like to sleep with many of them..soft, lightweight, large, small and fresh smelling. I also love to make them, mostly quilted pillowcases are my faves. I also love to recycle old pillowcases, those that have initial of former owners and stitched in their fronts. I have many pillows that were handed-down to me by hubby´s oma ( grandma) and they all got those lovely embroideries and vintage laces...

Here are some of the pillowcases I have made :


These are the set of quilted pillowcases I made using blue & white fabrics.. The patches were actually made as I went sewing them... I have these standard templates for the patches taken from a book and I just kind of cut any fabric coming along my way that have blue & white hues in them.


I mostly quilt the top of my pillowcases using masking tapes and this is one tool I would never miss in my other quilting project be it a bed cover or a bag, etc.


Of course, I also make normal pillowcases out of remnants.  From time to time, I would figure it out what the color scheme would be by choosing from my stored fabrics. I found the fabric rest used for the 3 pillows above from a store that sells curtains. If you happen to have a store nearby, go and ask whether they dispose some of those fabric rests of curtians whose lengths were adjusted for their client´s made to order pieces.


This white pillowcase was made of a rest fabric and I just added the vintage lace I found from
the fleamarket...


Yes, bolsters or neck rolls are fun to make and you could also sew in or attach vintage laces at each of the ends so they would look romantic..


And finally, this is a pink stripe cotton fabric which I found so romantic that I made a couple of pillowcases for my guest bedroom, added the rose design fabric, cut it into strips so it would look like a decor band and add the laces on both sides...

I hope that this blog has inspired you to make your own pillowcases, too!
Wishing everyone a nice evening ahead... Thanks for being here today.

Til Next, 

Mercy

From Table Napkin To A Kitchenware - Decoupage


When our new kitchen arrived and  had been fitted in our spanish cortijo ( country house ) , the wooden drawers were really nice but they lack fitted compartments that would hold all the cutleries and kitchen utensils.. I have no idea why they were not  furnished at all. I just  found out that the sizes of the drawers were not standard sizes  just like the way we are used to in Central Europe.  Some 15 years ago, there was no Bauhaus or Ikea at that time in Southern Spain and rural areas have just started to be awaken from the slumber as a fishing village when the  first flocks of tourists came and started building their second homes there.
It´s the lack of these resources that made some homeowners improvised, travelled from village to village to look for materials and organized craftsmen to build their homes, we were one of them...

When  I gave up searching for  compartments for my kitchen drawers, it occured to me that I will never find the size I need anywhere unless I had it made to order.  And so, upon returning to my homeland, I gathered all the materials needed to make the compartments. As I had taken all the measurements of my spanish drawers it was easy to make the boxes myself... and so I did make them and here is the result of one of the 2 boxes I´m  sharing in this blog. 

First, I constructed the 2 boxes I need using simple woods available in Bauhaus Hardware Store. Then I painted the box with an acrylic white paint , repeating the coats so it is totally covered, I sanded , paint again all the surface, then with the napkin below, I used the decoupage  technique to decorate the inside of the box with this lemon motif.. I cut the lemon design carefully then pasted it to the wood by means of a decoupage glue. One can also use an acrylic transparent paint to glue the motif, but it should be handled with care as the napkins are so thin and very sensitive to liquids.
After the box dried, I coated it with a transparent matt acrylic paint 4 times and let it dry completely.


I made the box a bit shabby looking by sanding its edges ( in green )  so that it would look used. I was  happy with the results and my cutleries were just meant to be sitting in here nicely. And oh, by the way... the box fitted perfectly in my spanish kitchen drawers!

That´s just about for today....have a good start on your Thursday by just giving your first smile to the first person you see  and feel happy by doing so...

Til next,

xoxo
Mercy