Challenging Arts & Crafts

Easy Pumpkin Strudel


Pumpkin Strudel

My godness,  I´ve just realized that pumpkin is so versatile after gathering all those  yummy & delicious  pumpkin recipes from  wonderful bloggers from various social media. I will try to sort out those recipes and try them sometime...


Meanwhile, here is what I baked today, I´ve been wanting to do this one....It´s a deviation of the popular viennese dessert "Apfelstrudel"... Instead of apples, I used pumpkin to fill the roll... here´s how I made it..


Ingredienst 
 
1 pack phylo/puff pastry - frozen or fresh
200 g diced and steamed pumpkin, butternut or hokkaido sort

250 g curd cheese
1 egg yolk
6 tbsp flour
120 g sugar or 6 tbsp stevia powder
1 tbsp grated Lemon rind
4 tbsp dried coconut flakes
1 cup red currant marmalade or jam

caster sugar to springkle on the strudel


Preparation:


1. Pre-heat the oven at  180°C. Smash the pumpkin with either the back of a fork or use a stabmixer to crush the pumpkin, blend thoroughly until a fine consistency is achieved. Add the curd cheese, egg yolk, the flour, the sugar, the coconut flakes and the rind of lemon, blend well... set aside.

 2. Roll out the phylo pastry without removing the wax paper... spread the squash mixture on to the phylo pastry evenly leaving 2 cm allowance on all sides..

3. With the help of the wax paper, roll the phylo pastry carefully towards the other end as in jelly-roll and close the middle edge as well as the sides by brushing them with water and pressing them slightly with your finger
.

4. Bake in a pre-heated oven of 180 °C for about 50 minutes to 1 hour.
To  prevent the top of the pastry from getting dark, cover it with an aluminum foil or wax paper after the first 30 minutes of baking, then remove the foil after  20 minutes. Continue to bake for 10 minutes more  to make the crust crispier.


5. Remove from oven and sprinkle with caster sugar and top with red currant marmalade that was heated beforehand in the microwave.
Serve warm or cold... 


HAPPY BAKING!


a parade of pillowcases and laces


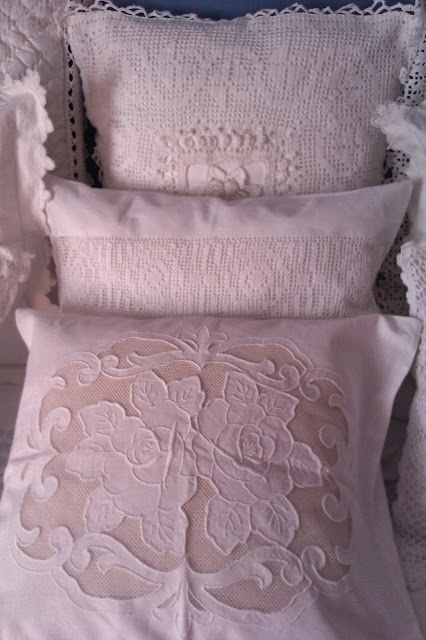
One of the fave things I´m into nowadays is white pillowcases, made some a couple of weeks ago. 

Yeah, I´ve collected a few already, it all started during my  holiday when I brought home a very pretty tablecloth and a pillowcase made by the women of Cyprus. They make pretty laces and in every town we visited, women have had their lace work done outside the house, so to speak in  their patios and sometimes these women sell their works directly right at their doorsteps...


I love to put up all the pillows when the bed is not in used, that  way it gives a romantic touch to the whole room..


 The tablecloth from Cyprus is big enough to cover the bed  and sometimes I use it as bedcover in the guest bedroom.  The crochet skirt is actually a  tablecloth which I also use to  give pretty decor effect to the bed when not in use. I made it some  20 years  back  when I commuted by train to work..


Some of the white pillowcases I have were handdowns   from "Oma", hubby´s grandma... She was an avid crafter like me,  she loved to embroider her pillowcases and I guess am lucky to  have inherited all her works. 


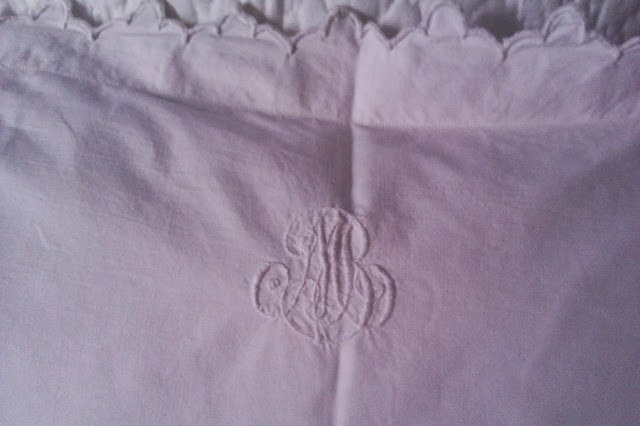
I found a pair of white pillowcases with monograms from  a fleamarket organized by schoolchildren in our vicinity,  lucky find though( see below photo)  ´cause the price tag was really  just a fraction of a cost, giveaways as such!


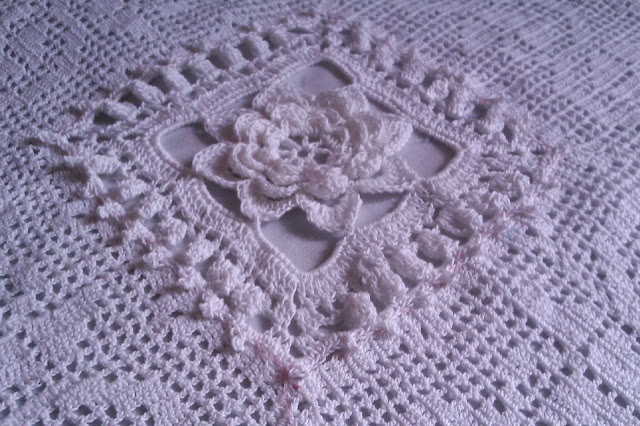
This is the center of the Cyprus tablecloth......


..... and the edge lacing on all sides.


A pillowcase from Cyprus


 A friend´s gift for my birthday


I got this from a fleamarket dealer for 0,50 Euro cents. To think of the work
involved in crocheting a simple lace like this.. it is not only a bargain, it´s a treasure..


 I made this one, I wanted to put an embroidered piece in  the center
 but later changed my mind and crocheted the middle part and stitched
 this onto the main pillowcase by hand..


Oma´s masterpiece using the richelieu embroidery  technique, cutting
 out the outline after embroidery was done and attached a piece of  what looked like a net as background of the whole work... it is indeed a piece of art!


 I´ve finally decided to finish the above pair during the last  couple  of weeks... Actually they were hand quilted by me as well  as lace edges were crocheted long beforehand.  The crocheted edges  were  intended to be laces for a bed canopy that I wanted to make, but it  did not materialize because I opted to use a different fabric for  the canopy panels... I will still continue to add to this collection and hope to find more treasures like these...

I hope everyone´s doing good and enjoying Sunday.. 

Wishing you all to have a good start of the week!!!

Til next,

Mercy

the flowers in my backyard - 2013


All of these flowers have been my inspiration all summer long..  


I made bouquets out of them to decorate my home. 


I´ve planted some bulbs in the autumn of 2012 and they
came out  wonderfully this year...if  only the slugs weren´t
  in  my backyard :-(


I´ve had tulips in spring, amaryllis from Spain, potted lilies, forsythia, 
hibiscus and  my dog´s yellow roses as well...


I ´ve had squash flowers too!!!... as well as some potted violets and
some I don´t even know what the names were except that I loved them the
moment I saw them at the garden center...


The most fragrant of  all are the yellow roses, the potted lilies as well
as the honeysuckle


I´ll have fond memories of these flowers especialy in a gloomy day
 of autumn when the skies are gray.  I hope these photos  made you smile....


Til next...
 
Mercy


Soft furnishing ideas


 Today, I´d like to share a hobby that I really enjoy doing...
and that  is  decorating with soft furnishings... I love designing and
 creating them, too!
So far, I´ve done quilts, pillowcases, tablecloths, blankets, placemats,
 linens, curtains and and and.... 

Scouring the flea market is for me a fave pastime and sometimes
 if  I´m lucky, the loot could include vintage linens, even hand
 embroidered  pillowcases and tablecloths.  


About a week ago, school kids in our area organized a  flea market, 
 it was one of those I thought would be boring.. 
but, I found some  hand embroidered  doilies and this pretty 
  crocheted  tablecloth in PINK.... yes, in PINK !!!


 Pink isn´t my  color since I would usually crochet using white thread..
  My heart went weak,  I couldn´t resist this one, the price tag was
 only 0.50 Euro cents and  it looked so crisp as if it has never been used.
  What the heck I thought,   I´m going to get it and I would have to
  do something to make it fit into my decorating scheme... 


Soooooooh!..... using my imagination , I´ve searched for the right 
fabric from my stash and... bingo, I found one that coordinated
 with the pink crocheted cloth.. and so above the table setting above was born...


I have some weakness for white pillowcases, I collect some and I 
just have to have them. I did some myself, got a few as hand-downs
 as well as bought a pair from places I´ve been to...
 the above are a few from my collection..


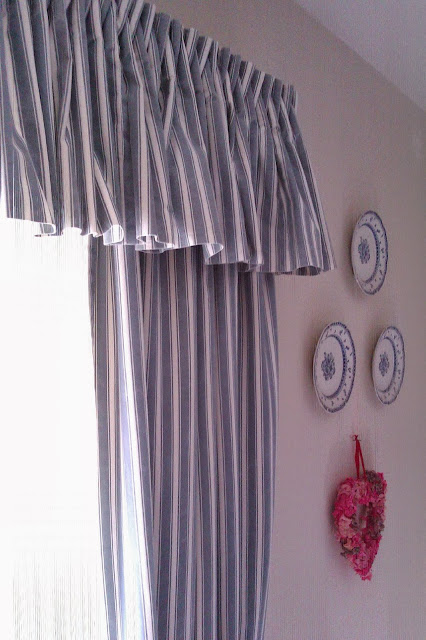
Curtains are easier and fast to make, with all the  curtain 
materials  and accessories available in the market, they are not really
that difficult  to make... I really love making them. All the curtains 
featured on this site were made by me...


If you want to see more of the curtains I made, please click
 the links below

and


I hope this blog has given you some inspirations..


Thank you for reading and visiting me..

Have a nice and good start of the week!!!


Braised Cauliflowers


A truly enjoyabe meal and easily prepared...The ones available locally
 come from the Mediterranean area (Spain, Italy & France).
 Cauliflower is rich in Vitamin C , low in fat and carbohydrates.
  I prefer to cook it with liquid.. Hope you enjoy this as much as we enjoyed it at home..

  
Braised Cauliflowers

Ingredients

1 head cauliflower
2 cloves crushed garlic
2 tbsp olive oil
1 bunch of spring onions
2 medium size carrots
1 each red & green bell pepper cut into 2 cm squares
200 grams of ham, cut into cubes of 1 cm
1 tbsp soya sauce
fresh parsley, cut 
1 tsp heaved nutmeg powder
3 cups milk
salt & ground black pepper
2 tbsp flour dissolved in 4 tbsp water


Preparation: 

1.
Divide the cauliflower into flowerettes using fingers separating 
it into small pieces, wash and set aside. Meanwhile, peel & cut
 the carrots, dice the bell peppers and  cut spring onion
 into cubes or small pieces as shown in the photo above. 

2. 
Heat a pan with 2 tbsp olive oil & fry the crushed garlic
 til it becomes golden Brown. Add the diced ham ,
 bell peppers,  cut spring onions... mix thoroughly
  & stir fry for about 4-5 minutes. 

3. 
Add  the 3 cups of milk, let it boil then cover and  simmer under
 low heat for  about  10 minutes or til vegetables become soft.
 Add the nutmeg powder &  soya Sauce. If the milk has evaporated , add 
more 1/2 cup & continue stirring,  add the fresh parsley and  season
 with salt & pepper ... Lastly, add the dissolved flour  and
 continue stirring til  liquid becomes thick but well blended. 
Serve hot with white bread or potato patties.


Cutting parsley I grow in pots. A bunch is enough for the braised cauliflower..


Happy Cooking!!!


Of laces & crocheted pillowcase ......


Crocheting is one passion I´ve been doing as far as I can remember.
  At a young age of 9, I became so curious at how a friend´s older
sister did all those pretty lacy bedcovers in their home. I think her
 beautiful laces which she painstakingly done with pleasure, somehow
the challenge triggered my subconcious to learn & try this craft. 


Finally, I asked my Ma to get me a hook and yarn so I can try it myself...
I love it ever since and the more I learned each day, the more excited
 I became. I gave my mom my first curtain which she then put up in the
 windows of her canteen  a couple of months after.

 Since then, I´ve done many projects .....be it tablecloth, bedspread,
doilies, tops and many more....you can see part of  my works in
one of  the blogs  featured here called Lovable Doilies and Crocheted Laces .


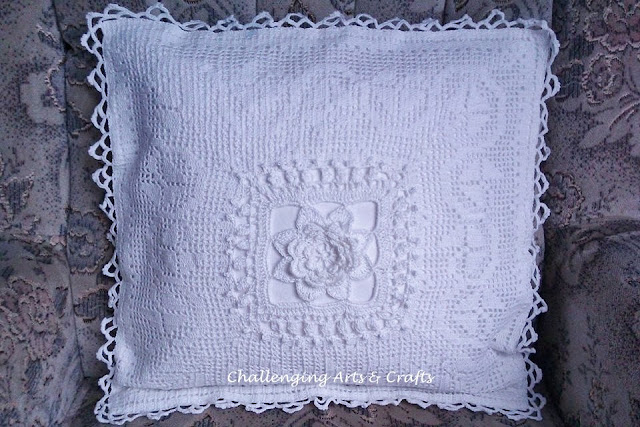
 This particular pillowcase had been a work in-progress that
 I haven´t touched in 6 years... The middle cloth should have been
 embroidered but I thought of it as boring or inappropriate since I want to
have an all white pillowcases that look romantic to add to my  all white ollection.


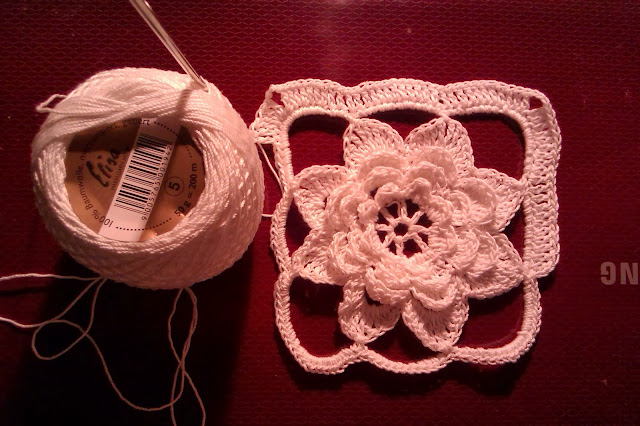
.......so, I started to make a flowerette, I didn´t have a pattern for this,
 but I know that I had to make 8 petals so I crocheted 8 petals
 until it reached the desired size that is proper for the missing
 middle  part of the pillowcase.


Added to make this square complete are the popcorn stitches that I enjoyed
to stitched.This is just perfect I thought and will make a great center of
attraction for the pillowcase..


Then, I took out the cloth from the center and replaced it with the
 crocheted  flowerette. Good that I simply basted so that it was easier
to remove.


The flowerette was attached temporarily with long stitches using
 a pink thread onto the center. That way, I would be able to see
 it and remove the thread easily when the flowerette is finally  stitched
 in place with white thread.


 For the back of the pillowcase, I cut white cotton fabric to the size
 of the pillowcase + 2 cm allowance on each side. I added a button
 closing using the locally popular metal ring buttons covered with
 linen thread for pillowcases.


All in all, I´m satisfied with the result, and adding one more pillowcase
 to my growing white pillow collection... I hope that you like my blog for today...
Hope to hear from you... comments are welcome!

Wishing you a blessed Sunday !!!

xoxo,

Mercy 

creative chaos & pumpkin chutney


Whatever is  the difference between squash & pumpkin  isn´t really
 an issue for me as far 
 as my cooking or baking is concerned. 

After a couple of weeks, the harvested cucurbita maxima type has now
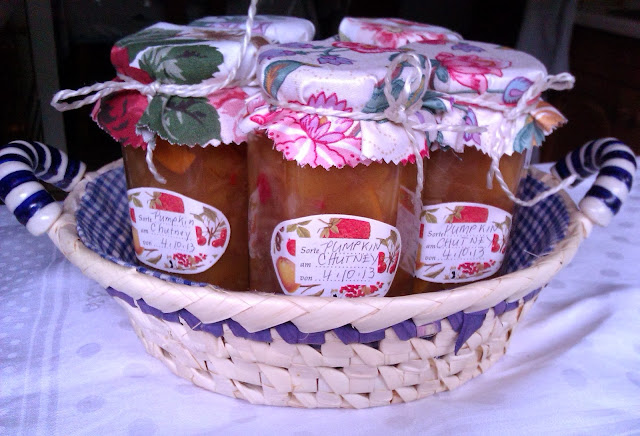
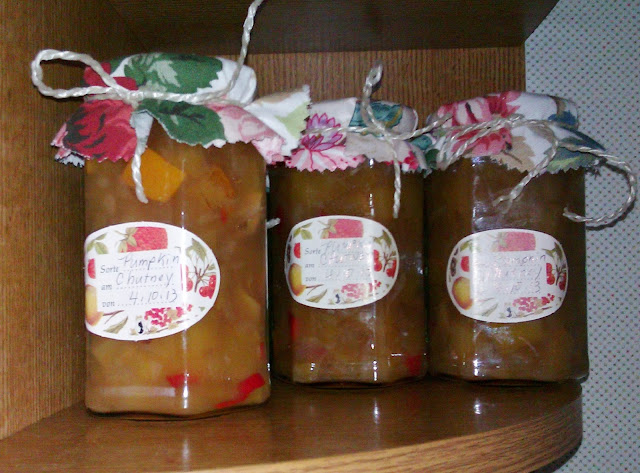
 been cut, peeled and cooked and I labelled the jars as Pumpkin Chutney.


It deemed on me that I would need a couple of days to use-up all of it.
Yes, all of the 9.2 kilos in total weight....Oh my, what to do, which recipes?
Anyway, I have "Oma´s" ( hubby´s grandma) recipe for the Chutney at any rate.


It was a bit of a surprise that half of the weight composed the seeds
 and the fibrous part.  Feeling relief? ...yes, I was!

 After removing the seeds and the fibrous part, my kitchen looked
 like a battlefield which my better half called a "creative chaos".
The rest of the cucurbita was made into salted muffins with Ricotta.

Below is the recipe for the 7 jars of Chutney.


 Pumpkin Chutney

Ingredients:
2.5 kgs unpeeled pumpkin cut into 2 cm chunks ( or butternut squash )
3 large diced onions
4 red italian chillies, deseeded and finely chopped
3 apples , cut into 2 cm chunks
700 ml apple cider vinegar
500 gms brown sugar
1 tbsp  salt, 
1 tsp garlic powder (optional)
Preparations.
1.
 In a deep casserole, bring water to a boil. Dip-in  each of the glass jars
    one by one in the boiling water to  sterilize  them, set aside.
2.
  Combine all the ingredients in a big casserole and cook all til boiling point. Reduce
     heat , stirring occasionally, simmer for about 1 hour or until the chutney becomes
     soft and thick. Spoon Chutney into the jars closing the lid immediately.
3. 
If you like, you can trim the glass jars with a fabric, covering
 the  lid just like how I trimmed each of the jars. Label the jar, specify  the
 date  when Chutney was cooked, and store in a cool dry and dark place.


The chutney can be stored up to 3 months after its filling.


 Hope you all have a great Weekend!