Challenging Arts & Crafts

the night gown project...


Here it is, my night gown project finally done and photographed! I have been postponing to post this album , I just didn´t have the time to take photos...

The concept of this is a combination of crochet top and fabric for the body.. Although I intended to make this as a night gown, summer night gown actually, I could wear this also as house dress or even go food shopping in it. 

The granny squares totalled 20 squares all in all and 
are joined together by crocheting a single stitch at the back of each piece.


I have no pattern available...as  always, I just crocheted

 each round and it developed into a square just like any other granny square design.. I made 8 petals  and the rest is just experimenting... 


All in all, I crochetd &  joined 20 squares, each of which were crocheted during my train rides to work


This is how the top part looked like after joining the pieces


One square each for one way train direction or 25 minutes to finish one piece.


I used 3 vintage buttons that came from old buttons handed over to me by hubby´s grandma...see my Vintage mother of pearl collection here...


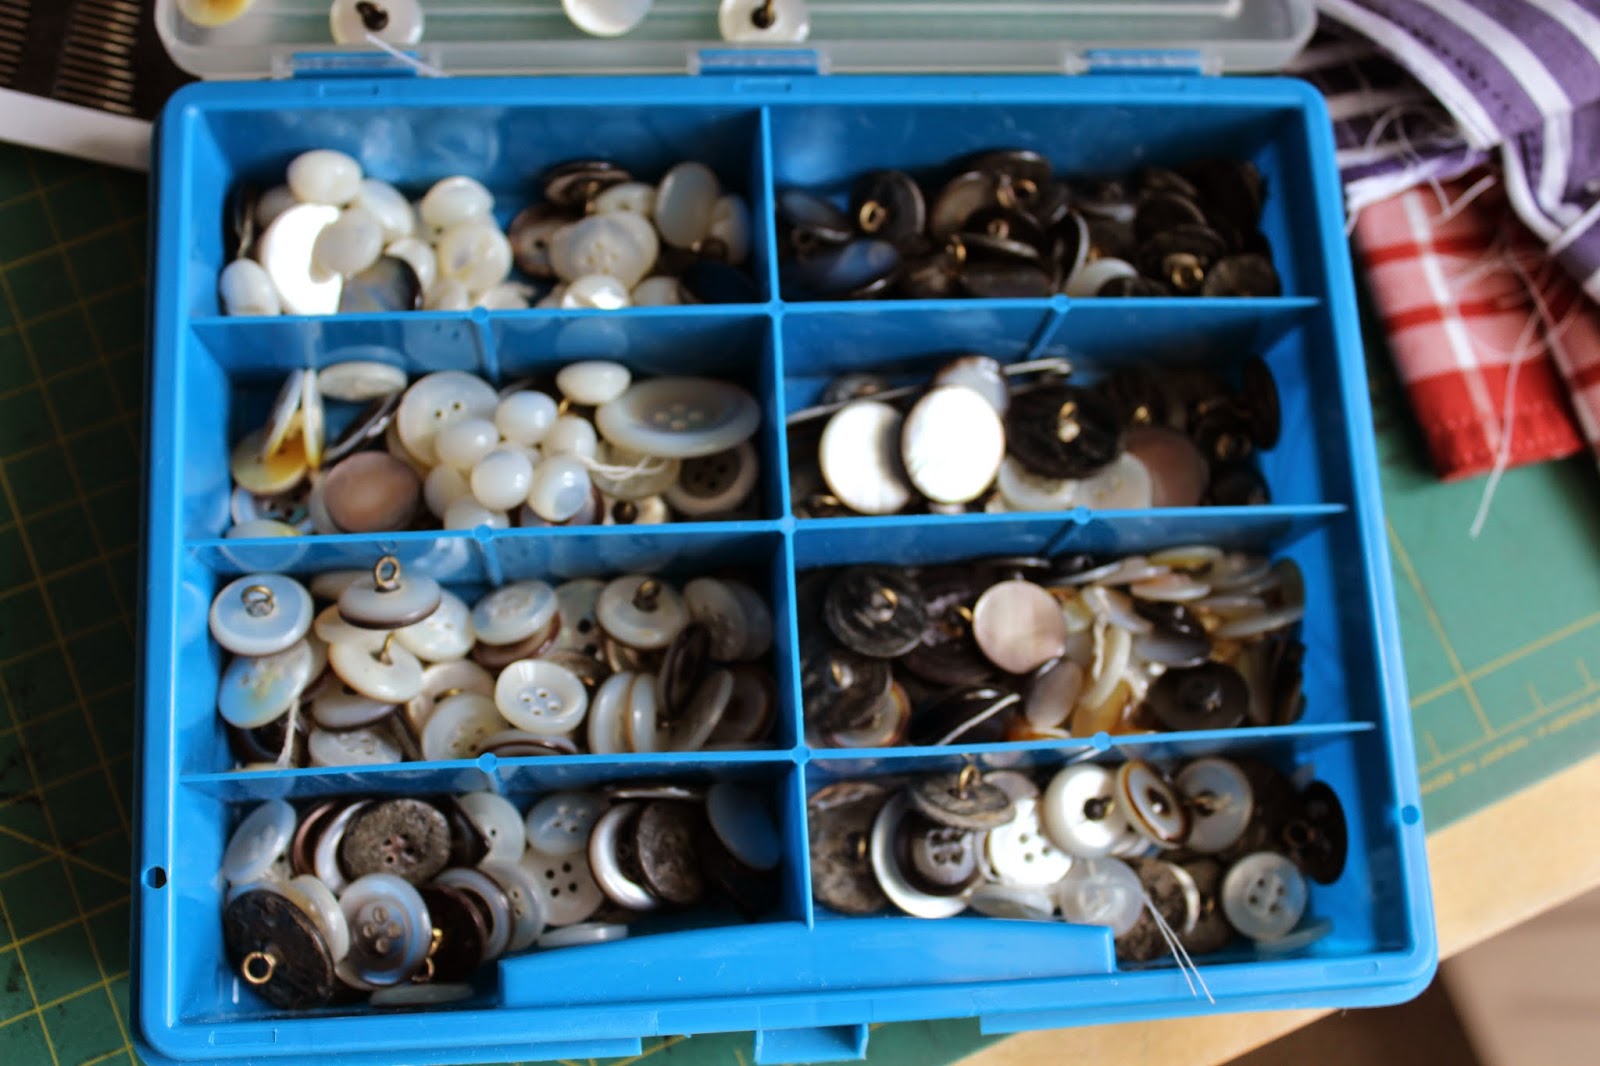
The mother of pearl buttons used  have been produced by hubby´s relatives before WW II.  It was a vocation an uncle have had where he made art pieces from those shells...


I made the closure using the same crochet thread I used for the square.


I joined the fabric and the lace by sewing them together... the normal way..


 This can be worn on both sides.


The crocheted top part made the dress look romantic...


That´s about for now, hope this dress will give 
 you an inspiration for your next project.

HAPPY SUNDAY !

xoxo,

 Mercy

Basil Ricotta Tart with Nectarines & Prosciutto


I´ve  been looking for a new recipe for salted Tart I wanted to bake and  came across this recipe.. It really tastes scrumptious that I made this so often. We love having this for dinner...

Adding the durum wheat makes the pastry so crispy that you would only want to eat the crust alone... try this salty sweet tart, you´ll surely like to make this more often. 


Basil Ricotta Tart

Ingredients:

For the Dough: 
75 wheat flour 
25 g durum wheat flour 
½ tsp salt 
45 g butter 
3-4 tablespoons milk 

For the Filling: 
2 Nectarines 
1 tablespoon brown sugar 
250 g ricotta 
Basil 
Salt, Pepper, Nutmeg 

8-10 Prosciutto slices
Basil leaves, red pepper 
olive oil 


Preparations: 


Preheat the oven at 200°C..

1. Place  the wholewheat flour, durum semolina wheat, salt and butter into the kitchen mixer.  Carefully add the milk-water mix by and by until the dough holds together. Flatten the dough, wrap it in a trasparent clinging plastic and let cool in the fridge for at least 30 minutes.

2. Meanwhile, wash the nectarines, dry with paper towel, stone, and cut into quarters.  Place the nectarines on a baking sheet and sprinkle with sugar. Bake for about 6-8 minutes until the sugar begins to caramelize so that the nectarine gets a bit of golden color. 

3. Roll out the dough and use it to line a square baking pan of about 20x20 cm.  You may also use a pie form if you prefer to use it.

Prick the dough several times with a fork, cover it with baking paper and add dried beans to bake blind the pastry. Let the pastry cool completely ready to use for filling.

5. Mix the ricotta with the finely chopped fresh basil and nutmeg. Season with salt & pepper according to your taste. Fill the cooled tart crust with the seasoned ricotta then arrange the nectarines by pressing slightly on top of the ricotta alternately with the prosciutto slices (see above photo). Garnish the tart with fresh basil leaves,  crushed red pepper and sprinkle with a bit olive oil... 


Note : The Original german recipe is from the book: Myriam's Kuchen, Tartes & Co by Myriam Zumbühl. For the puposes of translation, I added a few words for  my english readers.


two floral arrangements and potted goodies...


I would like to think that we are lucky to be living in the border of the city.. we are close to nature. We have fields and a creek nearby as well as a small forest like area and still we are in the city.


sunflower field  is near us.... how practical it is to just cut fresh flowers from this field.. As I have mentioned before in my previous blog ..a self service cutting field is near our home, pay for what you cut.. no cashiers, no guard..


On the other hand, a field of wild goldenrods is nearby... it´s in our biking route. 
So armed with a cutter, stopped by and got a few 
stems and brought  home a bunch. 


It is important to submerge the goldenrods in a bucket full of water to remove insects,
 cut a few leaves and stem to the length to fit the vase.  


Behind this sunflowers field is our home..


I chose a vintage vase with yellow color and grey stripes, I think the vase fits to the
 yellow color of the goldenrod wonderfully..
 what do you think?


Aside from the  floral arrangements I made last Sunday, I took  shots of my container veggies. 
It´s a pity that I started too late after coming back from a four-week holiday.


It´s kind of taking too long for these peppers to become red... 
we are having  a lousy weather, although sun
 is rare, it is still hot and humid and always
 raining.


The celeries are robust and do not need so much attention, I just water them everyday.


 ...and there´s my chili, I think it´s a mexican chili...I just wonder whether they are that hot!


Just a floral arrangement tip for the freshly cut 
sunflowers that I learned from the farmers:
 burn the bottom of the sunflower stem (candlelight) to prevent the milky extract from flowing out of it, then dip stem in hot water before putting in the vase... this way, the blooms will last for more than a week if you change water everyday..

Thank you for taking time to  read this blog...

Til next,

Mercy 

Linked to : Feathered-nest-friday.

spirea and its second life


It was a shock when we came back from the holiday, seeing its whole
 bush dried off completely, no sign of life...our spirea!


We would normally come back home by end of May or beginning June of each year.. ...
but we´ve had  an extended holiday in Spain and only came back in Vienna on the 3rd week of June. 


Never did I think that my spirea would still have the chance to get its life back.


Its container is actually a long narrow one facing the windows of my kitchen.
It was always a pleasure seeing this bush in summer because of the vivid deep pink 
color of the blooms...


I was about to take it off from the container where it was once planted...but I didn´t give up. 
I just let it stand there until a miracle happened..


I removed it´s dried branches and leaves and water it everyday and add fertilizer, that´s all
 it needed and four days after,  it begun to show the first sprouts...
 I was so happy!!!


.... and to date I always water it when I come home from work.  As you can see, the clusters are so beautiful and inspiring
 now.   It only goes to show that we should never  give up  hope so 
 easily on a thing!


xoxo.

Mercy


a humid weekend and a WIP project....


It really is a lousy weekend , weatherwise.... very humid! 
The weather in Vienna is constantly changing & unpredictable.

 This kind of weather is a torture for those people who have circulatory
  or heart  problems... 


 It is very uncomfortable to be just sitting here and  there and sweat without even doing anything.
Despite the heat, I forced myself to do some things yesterday and today, just to finish-up something.


 Actually, my usual time for the weekend is food buying on Fridays,  marathon 
cooking as well as household chores on Saturdays.
Sunday is spent usually relaxing, read papers, do crafts and some spare time to
 watch a good movie in the evening. 


Yesterday, in between my cookings, I baked an almond poppy cupcakes for the afternoon snack
 and enjoyed a cup of tea... At some point, I got bored with ice tea as I drink it almost everyday at work.

So, here´s that easy recipe ...


Easy Almond Poppy Cupcakes


Ingredients:
1 1/2 Cups all purpose Flour
1 1/2 tsps baking powder
 1/3 tsp. salt
1 cup powdered sugar or sweetener in powder form
 ( i.e.Stevia)
1/2 cup butter ( at room temperature)
2 large eggs
1/2 cups ground almond
3 tbsps. ground poppy seeds
1 cup buttermilk


Preparations:

Preheat the oven at 175 °C / 356°F. 
Coat the holes of the muffin by brushing it with butter or margarine..

1.
Sift Flour together with the baking powder &  salt. Add the ground almond and the poppy seed, mix thoroughly.. set aside.

2.
 In another container, put the electric mixer at high speed, beat the butter about 2 minutes until it´s fluffy, add the eggs, beating it properly until well blended.

 Add half of the sugar alternately with half of the buttermilk, mix once more,  then add the rest of the sugar and then rest of  buttermilk. Mix well and add this to the flour mixture. Using a wooden spoon, mix everything , see to it that the dried ingredients are well coated and moist.

3. 
Fill in  2/3 of the batter in each cupcake hole of the muffin tray....Bake for about 20 minutes or until cakes are done.
To make sure that the bottom of the cake is done, insert a toothpick in th center of the cake...if it comes out clean and dry...the cakes are done! Serve warm or cold.


And speaking of a WIP,
below is my work-in progress project..It´s going to be a night gown.


I used up 20 granny squares all in all.


The body part will be the embroidered cotton below and I would love to put cute buttons for the back closure..


Note: The finished nightgown will be featured
 here soon!


Thank you for reading this blog!

xoxo,

Mercy