Challenging Arts & Crafts

The Pearl Earrings


A formal gathering motivated me to make  this pair of danglings and its matching
bracelet... the color of the freshwater pearls matched the suit I was wearing. I didn´t want to wear black dress, although the dinner party was a formal one.
 
  And so I decided to wear a grey suit in the party and thought it would be appropriate for the occasion. Grey suit! Well, what jewelry matched this color? I thought silver would be ok, but I already wore a pearl necklace with a silver closure those past annual parties.


I´ve had a simple solution motivated by the grey suit... why not make a pair of dangled earrings?... quickly, I searched for the materials in my craft room and soon came up with some fresh water pearls in cream and grey (colored) plus I still had those mother of pearl bead remainders that I used from a past project .


 I had to buy the silver hooks/wires as well as the holder from a mineral shop in the city. Soon, I finished the earrings quickly in one sitting.. Trimmings like bead spacers were added to make them look more elegant.


Now for the matching charm bracelet... it occured to me that there was not much time left to go shopping for accessories!  I had a silver chain bracelet that I got from an online shop as gift for my  orders from them....This was the very bracelet 
I used to attached all the pearls to... and now my charm bracelet looked elegant, won´t you agree?


In doing this, I now have a charm bracelet that is matching to the earrings.. 

Hope you´re enjoying your Weekend nicely,  dear blog friends...


Thanks for visiting!!!


Til next,


Mercy


A Crocheted-Chair Coverlet


The 4 balls of cotton yarns were just kept handy in the cupboard just in case I wanted to start a crochet project during my holiday.
 
For about ten years or so, I never touched them. And,  I also didn´t have a chart or  pattern with me  to make this into a project.


 Since the only available hook I´ve had was bigger in size, I decided I would crochet double the yarn  to finish soon. The hook you see here has a size of 4 mm.


 First, I chained 12 to make a round , then crocheted 12 half stitches for the 2nd row...


This is a crochet as you go coverlet.... just increase the stitches that is built like an inverted pyramid.


At first, I didn´t have a firm idea of what this is going to be, I thought of  finishing the  balls of yarns as a pillowcase. Well, I can  still convert this into a pillowcase later. Then I chained the edges with a picot to give it a romantic touch.


     But, I just thought it might somehow serve as a coverlet for a chair...that would be nice I thought,


then, it became a coverlet!!! 


I finished the 4 balls of yarn just enough to make a 50 cm x 50 cm piece while watching TV ( during holiday).


I hope this gives you an idea for the yarns you´ve been hoarding.... :-) oTake your yarns out of your cupboard and start a Project now, LOL!


Wishing you a beautiful Wednesday ahead ...


Til next,


Mercy


Curtains for A Mediterranean Retreat


The previous months have really been so stressy for me, it was time to have a break from it all. So off we went to our spanish retreat in the Mediterranean to kind of relieve myself from the busy city life. It had been a great time to relax and be creative as well during this holiday. My project this time was to make new curtains.

My last visit to a fabric shop called Palacio de las Telas in Torremolinos last January was very disappointing. Gone were the tons of pretty floral fabrics mostly english in designs. Before the shop moved to the new site, which is now next to Ikea Malaga, about 1 Km off Malaga International Airport, they used to have so many, and I really mean so many beautiful fabrics at affordable prices.


The shop had those kind of give-away meters of fabrics that were either discontinued by its manufacturer or put on sale because nobody wanted them. Now, this shop became smaller and has unfortunately limited stuff. What happened? I would have thought that this shop has been affected by the ongoing financial crisis as any other „empresas ( companies) in Spain.


My 2 german friends insisted that we had to see Ikea since it was just a few feet away. Gazing at some of the master samples on display, a pink rose printed fabric caught my attention. I got excited!!! I needed 40 meters of this fabric. To my dismay, it was out of stock....:-(( ….. tough luck! So, I ended-up coming home empty-handed in Spain....


Well, that was about three months ago..... I wasn´t really that empty handed so to speak, because I got the same floral fabric from Ikea in Vienna. Yes the same fabric and all those 40 meters I needed. And to add to that, a pink and apple green cotton fabrics were bought as trimmings for the valance.


As an avid crafter, it always excites me when a new project comes up my mind especially after some stressy months at work. When I left for Spain early May for my 2nd vacation this year, I had 2 luggages that contained these 40 meters of materials which were meant for 1 big window and 2 terrace glass doors.


In Spain, I didn´t have a proper table to cut the fabric panels as the house is still being built. So, I had no choice but to work on top of the bed to measure and cut the fabric. My 4 fabric panels have the finished size of 150 cm width x 240 cm long, the other 2 are for the glass door that has 150cm x 230 cm in size... the last one being lower because there is an electric shade for the afternoon sun.
For 1 window, I needed 2 panels of 150 cm width fabric = 300 cm which when sewn together with the curtain band including the seam would create a finished size of 144 cm in width.
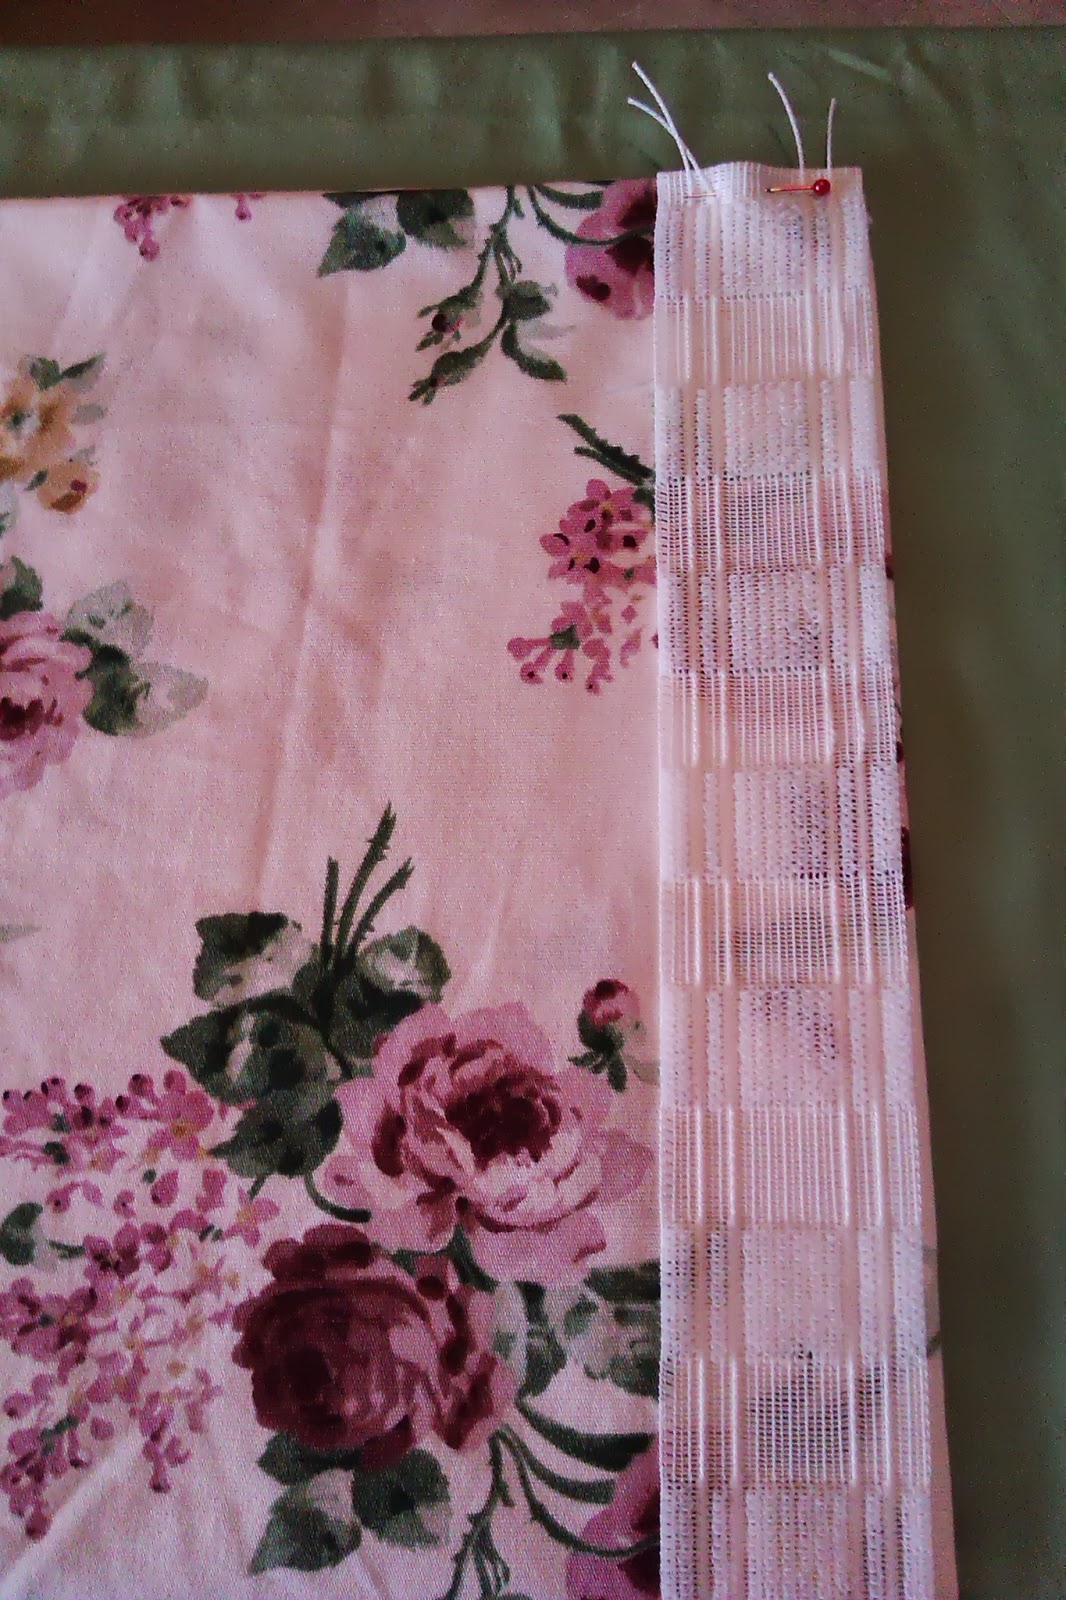
The band below is sewn up to the top edge of the curtain panel and the strings are pulled-out to achieve the finished size desired.


The hooks available in our local market vary a lot. There is one made of metal and one of plastic. The ones I tried were made of plastic from China, they are longer and softer to handle, but they always fell-off the curtain easily during the process of hanging the curtains onto its rail..
I brought along some curtain hooks made in Germany, but their heads are round and smaller for the spanish system... so I had no choice but to use the plastic ones shown here previously.


The most tedious part of the job of curtain making is preparing the valance materials. I used contrasting fabric, picked up some colors from the floral material and made pleats, attached this to the edge of the valance to look like pleated skirt. This way, the trimmings would make the valance look romantic but still hold that country feel as well as it would look customized.

I wouldn´t want to miss ironing the fabric during the process of curtain making. By ironing, the lines become straight and the patience of doing this is worth the Trouble as half of the work is already done.

Shown below, the curtain band with velcro is being sewn to the fabric, later the strings will be pulled to achieve the finished size of the valance.


Then, I pulled-the strings-up to arrive at a finished size of 5 meters x 38 cm. I never cut the pulled strings at the end of the curtain, I just secure these by gathering the string and pinning it on the inside of the panel with safety needle. This would allow one to adjust the width of the panels just in case the curtain is to be used on another window.


The curtain rails were made beforehand. As usual,  I stapled the rough side of the velcro band (the other half) onto the wooden front of the curtain rail. Velcro bands are practical to use ´cause you just have to take it off the wooden rail holder and wash as it is soiled.


The photos were taken at different times of the day, the reason why Colors are not that perfect.

The windows, grids and doors were installed but we didn´t have  much time left  for the interior painting. Well, there will be another time for this.


My holiday moved towards its end and though I was not able to finish the project completely, I felt fulfilled to have done a set of gorgeous curtains for this mountain retreat.


The curtain holders (tie backs) as well its hooks for the 6 side panels are „still missing“ but I repacked a few meters of the fabric which I brought along to my homebase.... Well, the curtain holders will have its own story and I sure hope to finish them real soon.

 I´m wishing everyone a creative crafty day!

Thank you for reading my blog.

Til next,

Mercy

Share at : Feathered Nest Friday ( Nov.22, 2013)

Spinach Tomato Tart

 
So glad that I found the tartlette forms 2 years ago in a shop that actually sells coffee. They are very practical forms as their bottoms/base are removable.  I used them for this recipe so I could freeze each portion  and will be ready to eat anytime for grabbing, that way, I don´t need to slice the tart.


 So friends, here´s how I made the Tarts:
 
Ingredients:
 
1 roll ready made puff pastry
500 grams of fresh or frozen spinach ( if frozen, thaw the pack the night before)
3 medium tomatoes
1 onion cut into strips
2 cloves crushed garlic
1 egg
2 tbsps olive oil
 1 tbsp soya sauce
1 tbsp sour cream
1 tbsp creme fráiche (or double cream)
1 tbsp raisins
1 tbsp pine nuts ( or coarsely cut almonds)
salt & peper
optional : finely grated grana padano (italian cheese)
 
 
How to :
 
1.
Roll out the pastry onto a board, remove its parchment/sheet and divide it into 4. Place each in the tartlette form tucking the excess  edges towards the inside of the form. Put a sheet of  wax paper to cover the pastry and add the dried beans on top of it to bake blind the pastry for 10 minutes with 180°C.
 
Remove the sheet and the dried beans and bake for more 10 minutes so the base gets golden brown in color, set the pastry aside for later use.


2.
In a pan with 1 tbsp olive oil,  fry the crushed garlic followed by Spinach leaves until spinach get softer & limpy and looses water,  slightly season with salt & pepper, remove excess liquid and put the spinach on a plate, set aside.


 In the same pan add 1 tbsp olive oil,  fry the onions, add the cut tomatoes,  sprinkle it with the soya sauce and  fry til they get soft, set aside.
 
 
3.
 Mix the egg, the sour cream , creme fráiche, season with salt & pepper and add 2 tbsp of this mixture to the onion and tomato and 2 tbsp to the spinach. Mix carefully so the liquid blends in with the vegetables.


4.
Using a spoon, fill each crust with the spinach and the onion mixture arranging the filling loosely  into the crust... add a tbsp of the egg mixture randomly and add the raisins, pine  nuts and  the grated grana padano cheese on top , place in the middle rack of your oven and bake at 180°C for about 20-30 minutes. When baking is done, carefully remove  the form´s bottom and arrange on a platter.  Serve warm or cold.


.
 

Enjoy Baking and have a nice Weekend!


Til next....


Easy Braised Pork Leg - Pork Pata


Friday is usually my shopping day, but today I had a day off from the office work and so I went food shopping. One of the meat offered at the shelf of our local supermarket were pork legs which we haven´t eaten for a long time.
 
Spontaneously, I got the ready cut legs ( the pig´s behind legs are longer than its front and have more meat), and I ´ve intended to cook it in my own version of the filipino dish called Pork Pata or  Braised Pork Leg... It is one of the fave dishes of filipino families usually cooked on Sundays.  It´s also served  in fiestas and family gatherings or on special occasions.
 
So, here is my version which is so easy to make,  that you would eventually sit and relax once it´s inside the cooker.
 
Ingredients :
 
1 kg pork leg (behind part) cut crosswise as in the photo shown above
3/4 Cup soya Sauce,
2 tbsp vinegar
2 tbsp sugar or equivalent sugar substitute
5 cloves crushed garlic
1 bunch of spring onions cut into halves
1 tsp black peppercorns +1/2 tsp. crushed 
3-4 Cups water
1 bay leaf
salt (optional)


Procedures:

 
1. In a pressure cooker, arrange a portion of  the cut spring onions until they  
    cover the bottom of the cooker, then arrange the cut pork legs on top of the
    spring onions.

2.
  Put the water in a Container  adding  all the rest of the ingredients into the  
    water.  Pour  mixture   into the  pot slightly covering  the leg pieces. Cover the
    cooker  cook under high heat until it boils, then reduce heat to low and simmer 
    for an  hour until leg pieces are soft. Check the liquid in the cooker from time to
    and adjust the  water if necessary. Adjust the salt according to your taste.
 
3. The spring onions placed  on the bottom of the  cooker will prevent the leg skin
    from sticking onto the surface of the cooker. Arrange the legs on a platter, set 
   aside. Meanwhile add extra fresh  spring onions into the cooker and cook in the 
  remaining liquid for 5 minutes til tender and garnish the meat on the platter with
  these , add  the  remaining liquid onto the platter.
 
  Goes well with cooked rice, serve hot.

                                                 Enjoy Cooking!


Note: I will post the recipe of  the Spinach Tomato Tart next after this blog.
 

Til next,

 Mercy 


Paris Adventure

 
Hello everyone!
 
Winter had been very long & hard in our part of Europe and with that came my flu with a very persistent coughing.. a total of 2 weeks sick leave  including a relapse affected my office work as well as my household chores.... But, thank God, recovery was at site...
 
Well, there´s a lot of catching-up with my blog, I guess.... First, let me share our adventure in Paris... We took the chance to visit this city a couple of weeks ago and here are some of the photos I took from my digicam... my apologies if the photos are not that sharp, that is because my hands always shake when I take pics, LOL! I was impressed by the Beauty of the Eiffel Tower. It´s actually magnificent to see this Tower right before your own eyes, so solid are its steel structures.


I took it with heart to see the whole of Champs Èlysèes so I marched from the Grand Opera passing by the Obelisk and the Place Vendome with its famous Shops for the rich. I must say, it was very brave of me to do it because it was such a long march of about 1.5 Km.. well, I just had a bit of swollen feet that day and strained muscles.
 
It was difficult to take shots of the Arc because of the trees on the left and right of the Avenue . And so what I did was to wait for the red light, crossed the street and stood in the middle of the Avenue beside the traffic light to get a pretty good shot.
 
The Avenue des Champs-Elysées has 4 lanes each side...my godness, you could imagine how nervous I was when the green light was on and I was  caught in the middle of the Avenue waiting for this monstrous traffic to a halt!!!


I had to see Mona Lisa, so inside we went  into the Louvre and to my dismay, hundreds of visitors gathered around her to take their pics,  as if they wouldn´t want to leave the area to give chance for others to take their own shots...
 
 
This Glass Pyramid is the entrance to Louvre 


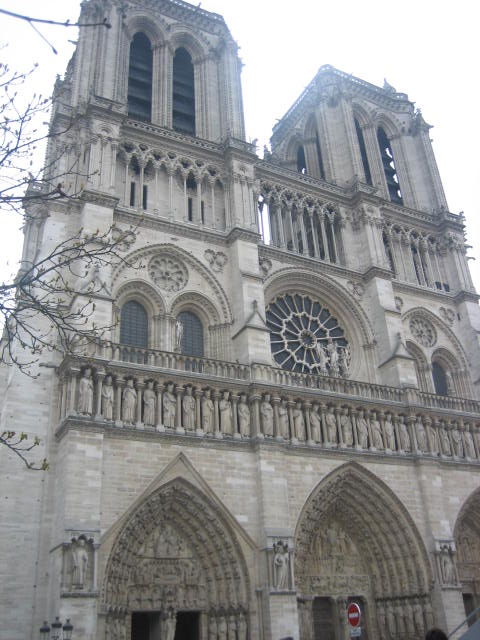
 The Tower of the Notre Dame Cathedral behind the buildings
 
 
 Front of Notre Dame Cathedral 
 
 
The main entrance to the Cathedral


Sacré Coeur in Montmatre


 We also visited Chateau de Versailles


 One part of the Garden of the Chateau 


The beautiful and amazing murals of the Chateau 


We also visited the Brocante of St. Ouen and we saw this pair
of chairs, very French and I must say they are so lovely!

 
The Brocante has all the pieces you may want to bring home from a holiday. you name it, they have it.  But, each piece commands a great price plus the customs duty should  not be forgotten.


Art pieces, vintage or antique were also offered..

 
Tasting the Tart Au Citron

 
In Montmatre, the sweets are allover...

 
...... as well as the fresh market was interesting to see.


sweets, sweets, and more sweets!

 
fresh harvest were also offered


 The Seine


To sum up our travel,  I learned a lot, especially  the beauty of the French architecture, their arts, the way of life of the locals and the richness of French culture.. and I tend to go back to see more...
 
  
Note: Coming up next : Easy Spinach Tomato Tart....here, a quick peek below
 

Thank you for taking time to read this blog, am wishing you a good start of the week.

xoxo,

Mercy